In this post I'll show how to easily create a blog on your own. Specifically I'll show you how to start a WordPress blog . Blogging has allowed me to pursue a calling in my life outside of my main profession as a dentist, and it's also been a great way to make some extra money too! The cool thing is you can start a blog that makes money for only a few dollars a month! In the post below, I'll give you access to discount pricing with Bluehost so you can start a blog starting as low as $3.95 a month. You'll also get a free blog domain when you use my link to sign up. I don't know how long this low price will last though, so you should probably act quickly.
To start a blog on WordPress click here. A new window should open in your browser, then you can return to this page and use the tutorial below for detailed directions on how to set up your blog.
After you're done, join my free 7-day email course to get your blog started right!
But First, Some Things You Should Know
If you'd like to skip this preliminary information, just scroll down to “Get Started Setting Up Your Hosting” to start your blog in 6 easy to follow steps.
The cheapest way to start a blog is by choosing Bluehost for your blog hosting needs. Personally, I've had a great experience with Bluehost and I know you will too!
Blogging has been a great addition to my life. It's allowed me to:
- Help literally thousands of people to manage their money better and get out of debt.
- Sharpen my communication skills and be more confident.
- Make extra money while building a business I can be proud of.
- Connect with people all over the world.
- Share my beliefs and my calling with others.
Anyone Can Make Money Blogging
Literally anyone can make money blogging. It's really not difficult to make enough money to pay for your blog hosting and use the rest as a nice side income. In fact, if you set it up right, you can earn passive income with your new blog that earns money while you sleep!
But the great thing about creating a money-making blog is that it scales quite nicely. Over the years I've personally gotten to know a ton of bloggers, and they make anywhere from a few hundred dollars a month up to over $100,000 a month!
Free Blog Sites are Not a Good Idea
One thing that every single one of these bloggers have in common is that they pay for blog hosting. You might be thinking it's a good idea to put your blog on Wix or Blogspot or another free platform to save a little money. But that is a HUGE mistake!
The problem is that making money on Blogger, Wix, Squarespace, or any other free blogging platform is really hard to do. Most advertisers and sponsors have a tendency to shy away from free blogging websites because they don’t see them be as professional as a self-hosted WordPress blog. That's probably the best reason to use Bluehost to host your website when you start a WordPress blog.
Good Reasons to Use Bluehost to Start a WordPress Blog
There are plenty more good reasons to use Bluehost to start a WordPress blog . I believe they are one of the best hosting platforms out there for beginning bloggers who want to get their blog up and running quickly. Here are some more great reasons to choose Bluehost as your web host:
- Stellar 24-7 support
- 99.9% Uptime
- When you get hosting throught Bluehost, you get WordPress for FREE.
- You'll be self hosted, which means you can much more easily monetize your blog and start making money more quickly.
- Easy to use- Anyone can easily create a WordPress blog using my tutorial below. Bluehost makes it very easy to start a WordPress blog.
- Unlimited Storage space
- People will take you much more seriously- A self hosted blog with your own domain name just looks more professional and shows you're more serious about what you're doing.
- Very affordable- the longer term you pay for in advance, the cheaper it is. Hosting starts as low as $3.95/month. You also get a free domain when you sign up.
- Unlimited Bandwidth
- Unlimited number of domains (meaning you can host more than one blog or website on one account)
- WordPress recommends them– Bluehost currently hosts nearly 1,000,000 WordPress blogs.
- Unlimited email accounts
- Values- Bluehost doesn’t allow pornography, nudity, or graphic adult content on their servers. So if this aligns with your values, that’s a huge plus (I know it is for me). Most hosting services will let just about any type of content on their servers, whether it’s offensive or not.
- 30 Day money back guarantee- I’ve never had to use it, but I know people who have. They had their money back within hours of cancelling their service within the 30 day window.
My Experience With Bluehost
By the way, I am a Bluehost affiliate, which means I make a commission every time someone signs up for service using one of my links. However, this is not the reason I recommend them.
Most all hosting services offer affiliate commissions. I recommend Bluehost because I've had a great experience with them and truly believe they are the best option out there for the beginning WordPress blogger (see the list of reasons above).
Bluehost Customer Service and Support
I've always had excellent experiences with their customer service. Whenever there has been a technical issue, they've always been there to guide me through to a solution in a fast and friendly manner! I wouldn’t recommend their service if I didn’t believe in them, and I don't recommend products I haven't used, period.
There are a lot of web hosting companies out there, but I believe Bluehost is no doubt one of the best. There's a reason why over 1,000,000 WordPress blogs are being hosted there!
Get Started Setting Up Your Hosting
So now that you know all the ins and outs, head on over to Bluehost to get started. Keep this blog post open in a separate tab in your browser to follow the tutorial I've put together for you below. It'll walk you through all the steps on how to start a WordPress blog using Bluehost's platform.
Click here to start the process
How to Start a WordPress Blog With Bluehost
What is “Hosting”: Your hosting account is where all the files associated with your blog will stay. Your “host” is a remote computer where you rent space (very cheaply) so your WordPress blog files have a home. It’s not hard to set up at all, so keep reading!
Step 1: Choose Domain Name and Hosting Service
There are 3 things you’ll need to start a WordPress blog on Bluehost:
- An idea for your domain name
- Your preferred payment method
- 20 Minutes or so…
If you already have a registered domain name there will be an extra step you'll need to do, which I’ll cover later at the end of this post under the heading- Extra Step: If You Already Own a Domain Name
You can click here to purchase a domain name and create a blog, then continue to follow the easy steps below.
Remember, when you sign up for a year (or more) of hosting using my link, you get a free domain name for the first year!
One thing about choosing a domain name– give it some serious thought. Don't try to get too cute. Make sure it's a domain name you can easily explain to people without confusing them because eventually you'll have to tell people what your domain name is. The easier it is to communicate to others, the better.
Step 2: Sign Up For Hosting
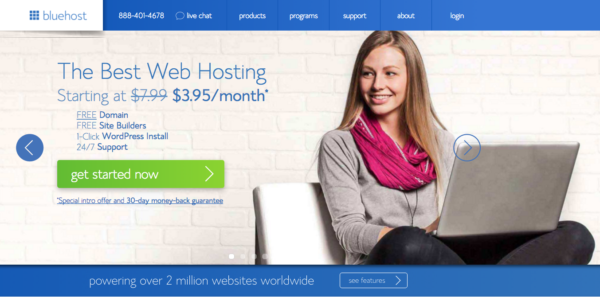
If you haven't already, Go to the Bluehost home page and click the “Get Started Now” button as seen in the Pic below:
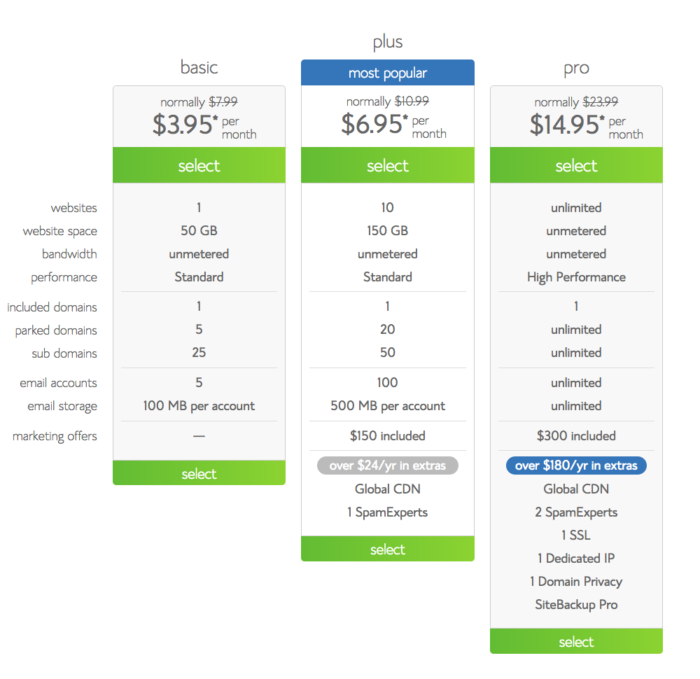
Then you will see a page (like the one below) with various plans available for purchase. As a beginning blogger, I recommend you go with the Basic or Plus plan. You can always upgrade to the pro plan later as your needs grow.
Definitely you will want to sign up for at least a year of hosting. Here's why:
- Signing up to pay month to month doesn't allow you to get a free domain name.
- Plus paying month to month means you pay more per month.
- When you sign up for at least 12 months in advance, you'll get a free domain name, cheaper pricing, and you won't have to deal with your website going down at the end of the month if you forget to renew or your card expires.
- The more years you sign up for, the less you pay.
Do You Have a Domain Name?
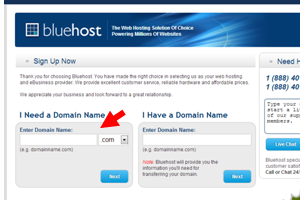
Once you pick your plan, the next page will ask if you need a domain name or if you already have one. I’ll assume you don’t already own a domain name (if you do, I’ll cover how to deal with that at the end of the post in the section titled “Extra Step: If You Already Own a Domain Name).
Enter the domain name you would like to have in the box, along with the extension that you want (.com, .biz, .info, .net, etc…) and click “Next”
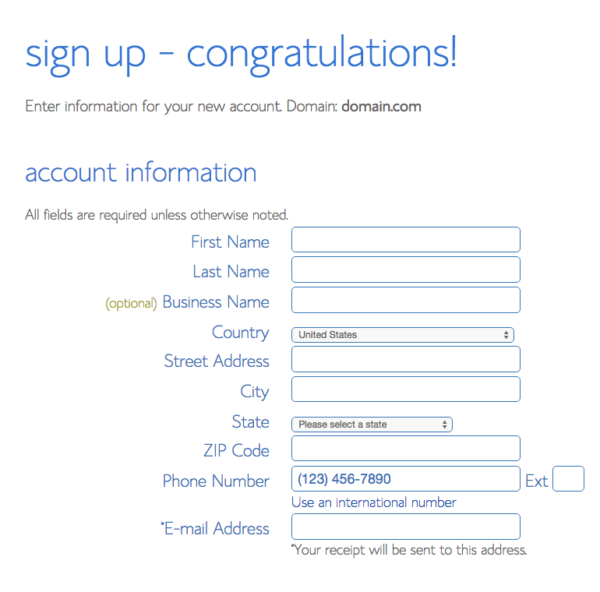
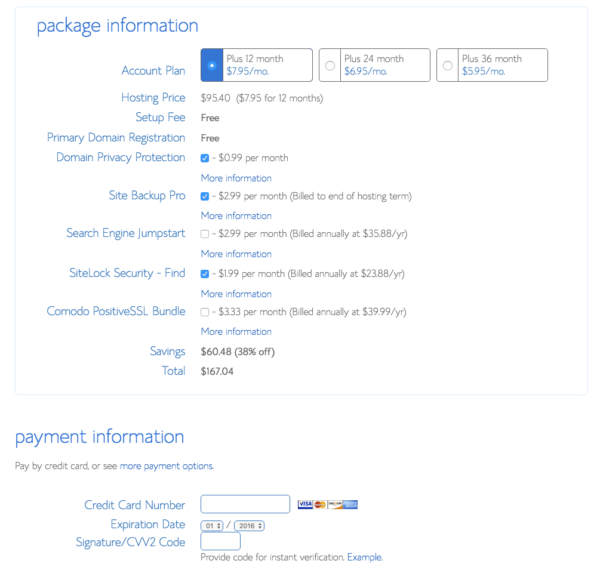
On the next page, Bluehost will ask you to fill in your account information, then choose a package lasting from 12-36 months. The longer the plan you choose, the cheaper it is per month.
Bluehost requires that you pay for your package in advance, but remember there is no risk, you can cancel within 30 days for a full refund if you need to for any reason.
I don’t recommend signing up for any of the additional services right out of the gate. As a beginner, you really don’t need them, and you can add those services later when or if you ever need them in the future.
Once you enter your payment information, check the box that says “I confirm I have read and agree to the terms of service…” Then click the “Submit” button at the bottom of the page.
Step 3: Install WordPress
Create a Password
Next, you'll need to create a strong password for your new account so hackers can’t easily gain access:
You can choose your own password or click “Password Generator” to have a random password generated for you.
Click “Create” and your Bluehost account will now be activated.
Heads up: It may take a few minutes for Bluehost to activate your account. If you get an error message, don’t stress. You can call Bluehost support at 1-888-401-4678 and they will be glad to help.
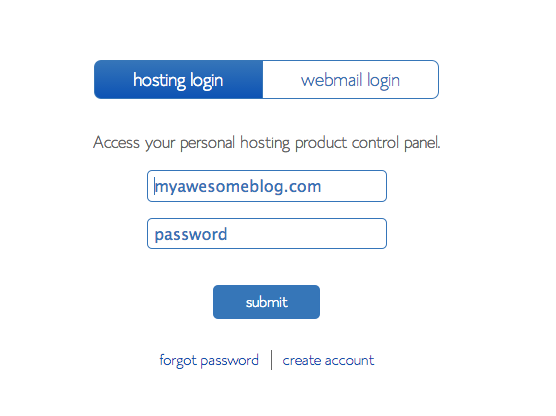
Once your account is activated, Bluehost will ask you to log in to your domain using your new password.
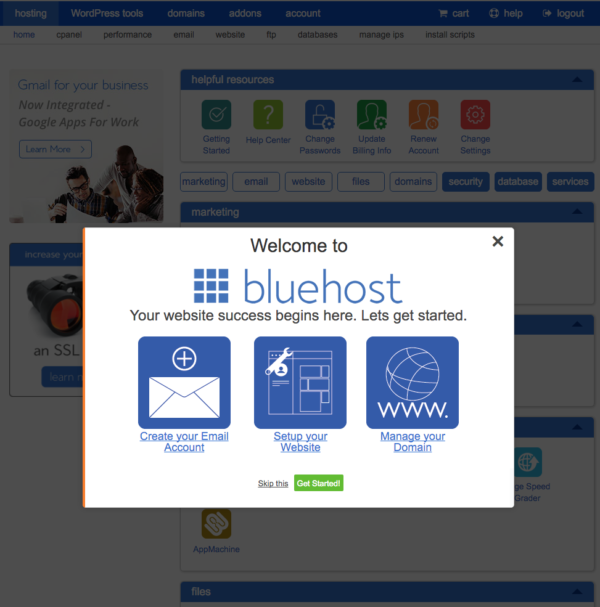
After you log in, you’ll encounter a popup that looks like this. Click “Skip This” for now, you can come back to it later.
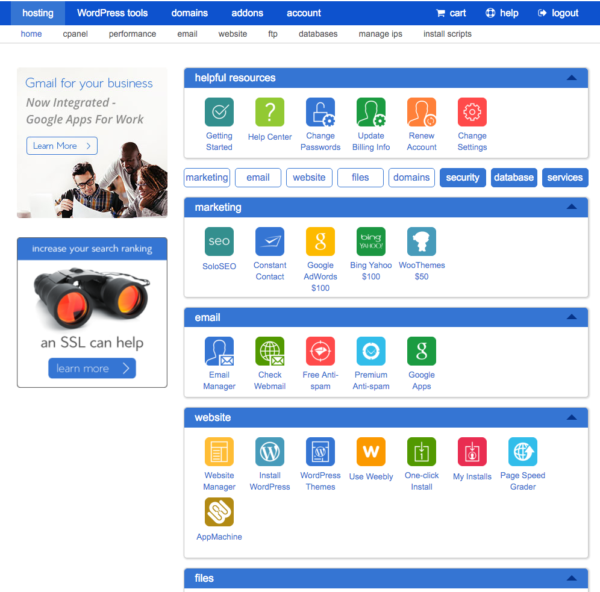
Then you'll be taken to your cPanel (control panel) which looks like this:
Start WordPress Install (don’t worry, it’s easy!)
On your “cPanel” page, scroll down to “Website” and click on “Install WordPress”. Then you'll be directed to a page with the WordPress logo and a button to Install Wordpress.
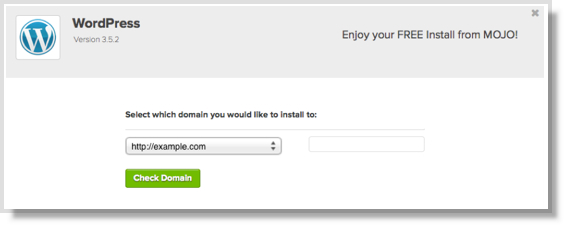
Click the “Install” button. After that you'll be taken to a page that says “select which domain you would like to install to”. The field should already be filled in with the domain name you chose earlier.
Then click the “Check Domain” button.
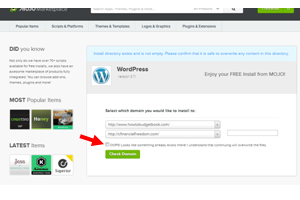
It will take a minute or so for Bluehost to check the domain. Then you might see a message with a check box next to it that says “OOPS! Looks like something already exists there! I understand that continuing will overwrite the files”
If that happens, it's ok, you didn’t mess up anything! Since this is a new blog, you won’t be overwriting anything important.
Click the “OOPS!…” checkbox, then click the “Check Domain” button again.
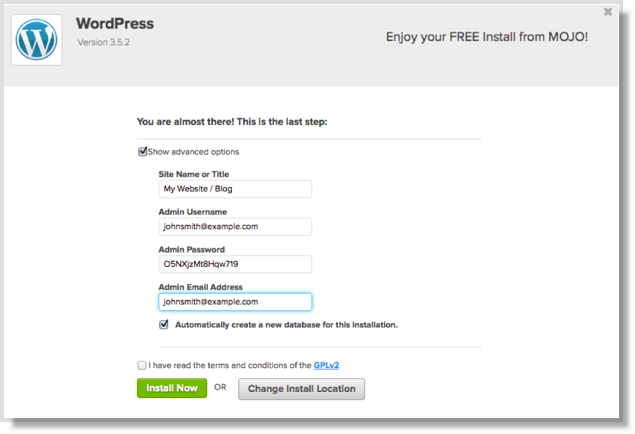
Next, you will see “You are almost there! This is the last step!” Make sure to check the “I have read the terms and conditions…” box, then click the “Install Now” button.
The installation process usually takes a few minutes. You will be updated as it progresses.
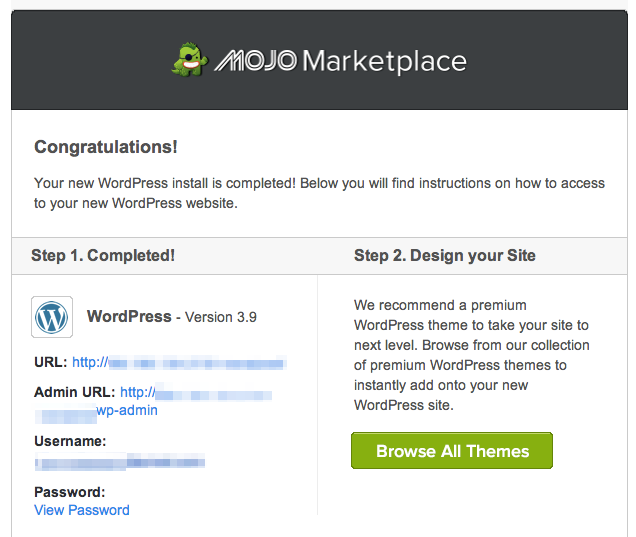
Once your WordPress install is complete, you will see this:
After You Install WordPress on Your Bluehost Account
Once your WordPress installation has finished, you'll see a screen with the URL of your new site, the Admin URL (your WordPress login page), username, and password. Write these down or take a screenshot to save for future reference. You'll also receive an email from Bluehost with that information.
Next, click on your blog’s URL and your new blog will load to a new tab in your browser.
At this point, your blog will look pretty generic because you haven't customized it yet. Later you can choose a “theme” that allows you to customize your new blog and make it look exactly like you want it.
Step 4: Login to Your New WordPress Blog!
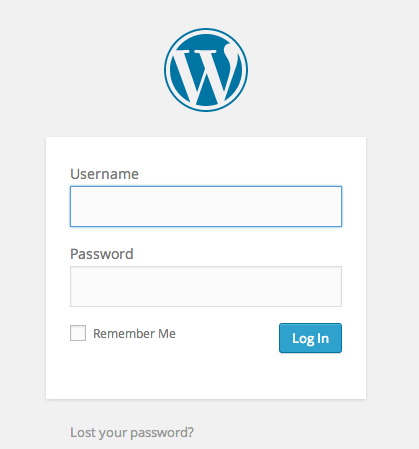
Now, click on the “Admin url” link, and click on it. A login screen appears where you will enter your Username and Password to access the back end workings of your new WordPress blog.
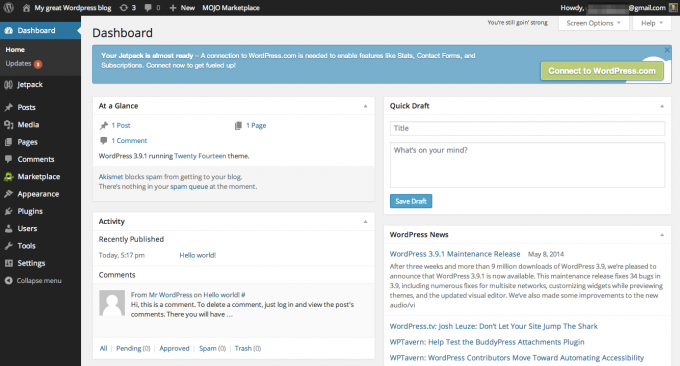
When you login, you will be taken to your WordPress Dashboard (see below) where you will have complete control over every aspect of what the end user sees.
Step 5: Write Your First Blog Post on Your New WordPress Blog!
Now you can write your first blog post! In the left sidebar, click on “Posts”, then “Add New”, which will take you to the “New Post” screen.
Enter a title at the top of the page, then in the blank field below the title, write your first blog post by typing in whatever you like. You can tell people why you decided to start a WordPress blog , what your new blog will be about, or just say hello world- whatever you want, it’s completely up to you because you are the king (or queen) of your blog!
When you want your blog post to go live, go to the right sidebar and click “Publish”. At that point, your first blog post will go live to the world so you can start getting followers and growing traffic immediately!
If you want to see how your blog post looks to your readers, just click the “Preview” button in the upper right area of the right sidebar
YEAH BABY, you are now a blogger!!!
Bookmark Your Blog
You should bookmark your dashboard page so you can easily to return to it and login any time you want. If you have already clicked out of your dashboard, you can get back to it by going to http://[the name of your blog]/wp-admin
SWEET! Isn't it a great feeling to finally publish your own blog? CONGRATULATIONS!!!
Step 6: Install a Theme for Your WordPress Blog
Now that your new blog is up and running, you should install a theme so you can customize the look and feel of your blog. There are thousands of free themes available, some good, and some not so good.
However, I recommend spending a little money to buy a premium theme.
Why?
Because a premium theme:
- Looks better- not as generic as most of the free themes
- Functions better- especially on mobile devices, which are what most people use now instead of a desktop.
- Is more customizable- you're more able to get the look and feel you want for your blog.
- Tends to be less quirky and more straightforward to work with
I recommend the Get Noticed theme and most themes based on the Genesis framework from StudioPress. You can click the links to those themes to find out more information and purchase if you choose.
To install a theme, just follow the instructions provided when you buy one of the custom themes above (don't worry, it's easy peasy!).
Extra Step: If You Already Own a Domain Name
If you already have a domain name on another hosting service, all you need to do is point your domain name to Bluehost’s servers.
You will need to login to your account where you bought your domain name (GoDaddy, Namecheap, Google Domains, etc.) and change the DNS (Domain Name Servers) to point to Bluehost's servers instead of the servers they are on now. If you're not sure how, you may need to contact support where you bought your domain name.
Enter your updated name server information to show Bluehost's name servers- ns1.bluehost.com; ns2.bluehost.com.
After you point your domain name to Bluehost's servers, then you will need to add the domain you bought elsewhere as an addon domain to your Bluehost web hosting account.
To do this, log into your Bluehost account and click on “Domains”. Then click on “assign.” Then follow the steps, it's very easy!
Be sure to read all the information carefully.
It can take 24-48 hours for the changes to take effect. Be patient. Once your domain shows up on Bluehost’s servers, you can scroll back up to Step 2 to complete the rest of the steps to get your WordPress blog started.
Questions and Help
This should effectively get you through the process to start a WordPress blog and get it up and running from zero to first blog post!
If you have any general questions or need expert tips about how to start a blog, what you should blog about, writing, etc., please don’t hesitate to contact me.
However, I’m not a tech geek, so any technical questions can be answered by Bluehost Support or WordPress Support Forums.
Thanks so much for using this tutorial to start your very own self hosted WordPress blog! I hope you enjoy blogging as much as I do and that it allows you to achieve bigger and better goals in your life!
Resources for the New Blogger
By the way, once you start a WordPress blog and set it up on Bluehost, you might want to check out some of the articles below to get you started on the right track with how to make money blogging, why you should start a blog, and how to grow your blog traffic:
A Huge List of My Favorite Free (and Paid) Blogging Resources
Make Money Blogging- Problogger.com
Why Every Blogger Needs an Email List
21 Tactics to Increase Blog Traffic
18 Tips for New Bloggers – Amy Lynn Andrews
10 Tips for New Bloggers…From a New Blogger
Ways To Make Pennies, Hundreds or Thousands A Month By Blogging
Why You Should Start a Blog (Even If You're Not a Writer)
This post is part of a special 7 day email course about how to start a WordPress blog , grow traffic, and make money changing the world one blog post at a time. You can sign up for the email course here or in the signup box below.





It was nice meeting you on Saturday in Nashville. I hope to learn more from you soon. Thanks, Dan http://www.thefinancepatriot.com
Hey Dan, It was great to meet you too! Great blog by the way! I’m sure I’ll see you again soon at the next FinCon meetup.